
一直以來都用 VScode/Cursor 開發,直到近期在寫 Swift 嘗試用了 Xcode。
整體來說功能很多,甚至也有 Auto Complete、預覽等等功能,但我就是用不習慣,畢竟這麼多年都是用 VScode,突然要跳到完全不一樣的 IDE 感覺渾身不對勁,接著我開始尋找能在 Cursor 上能順利寫 Swift 的方法,當然最簡單的就是兩種 IDE 都開著,直接切換順便開預覽就好,但就很麻煩啊!我只想開一個而已!
理想的狀況是只開 Cursor,還要有模擬器跟 HMR 的功能,不然就沒什麼意義了,下面是我配置的步驟
安裝本地工具
先在本地安裝幾個相關工具,這邊都用 Homebrew 來安裝。
// sourcekit-LSP 在 Xcode 之能外正常執行
brew install xcode-build-server

// 美化輸出,可不裝
brew install xcbeautify

// swift 格式化工具
brew install swiftformat
建立專案,在 Xcode 中設定檔案
為了方便測試,這邊直接用 Xcode 新增一個專案。別建立在 Desktop、Documents 底下,會因為權限問題噴錯。
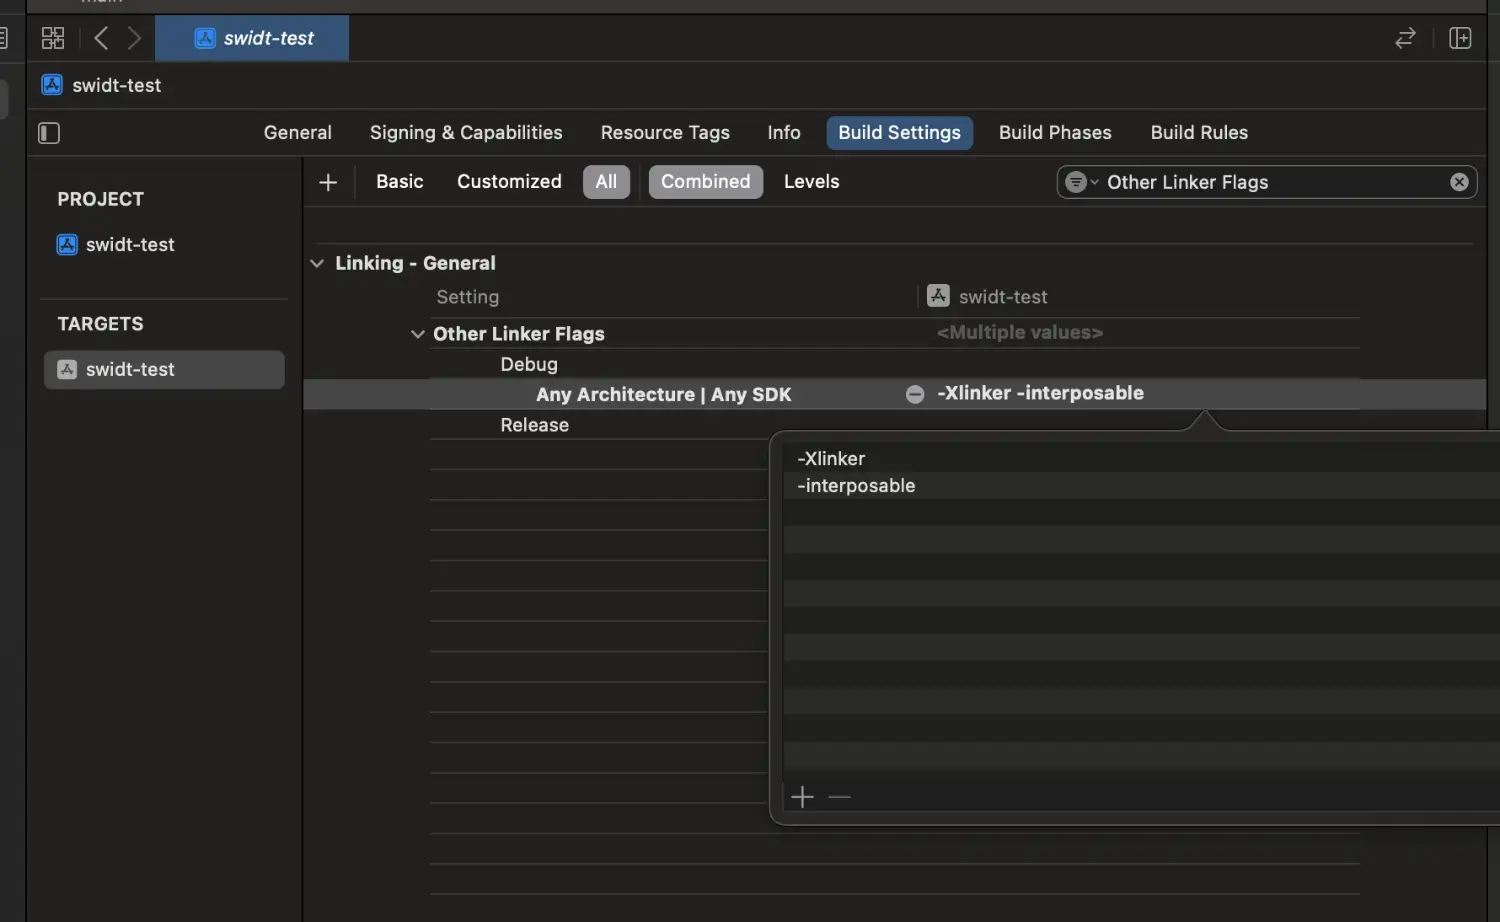
接著在 Xcode 專案內的 Build Setting -> Linking - General -> Debug 的地方加上兩條:
- -Xlinker
- -interposable
如下方圖片:
同時新增一條 EMIT_FRONTEND_COMMAND_LINES,value 要輸入 YES,如果找不到就自己建立,如下圖:

主要是因為 Xcode 16.3+ 預設不產生 DerivedData/Logs/Build/,不新增的話之後的 injectioniii 無法使用。
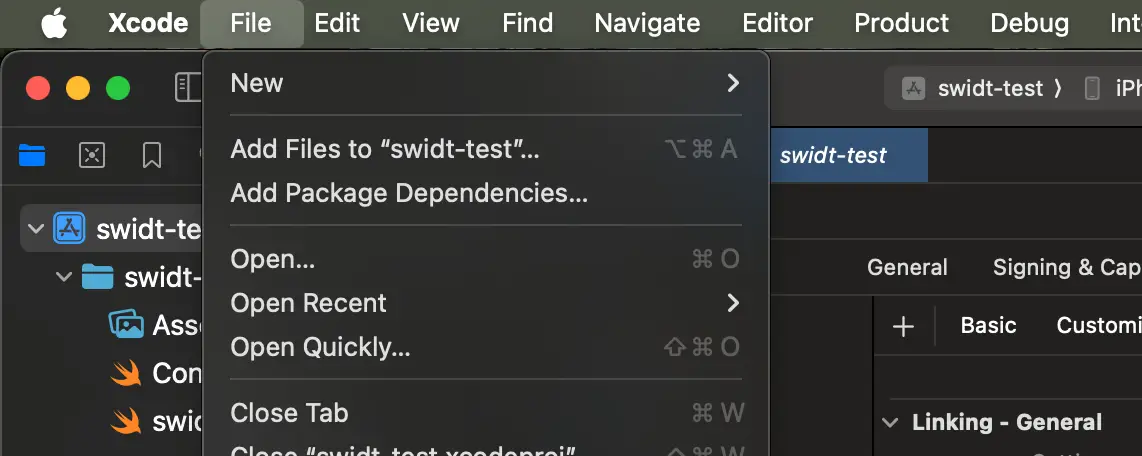
Xcode 安裝套件
點左上角的 File -> Add Package Dependencies
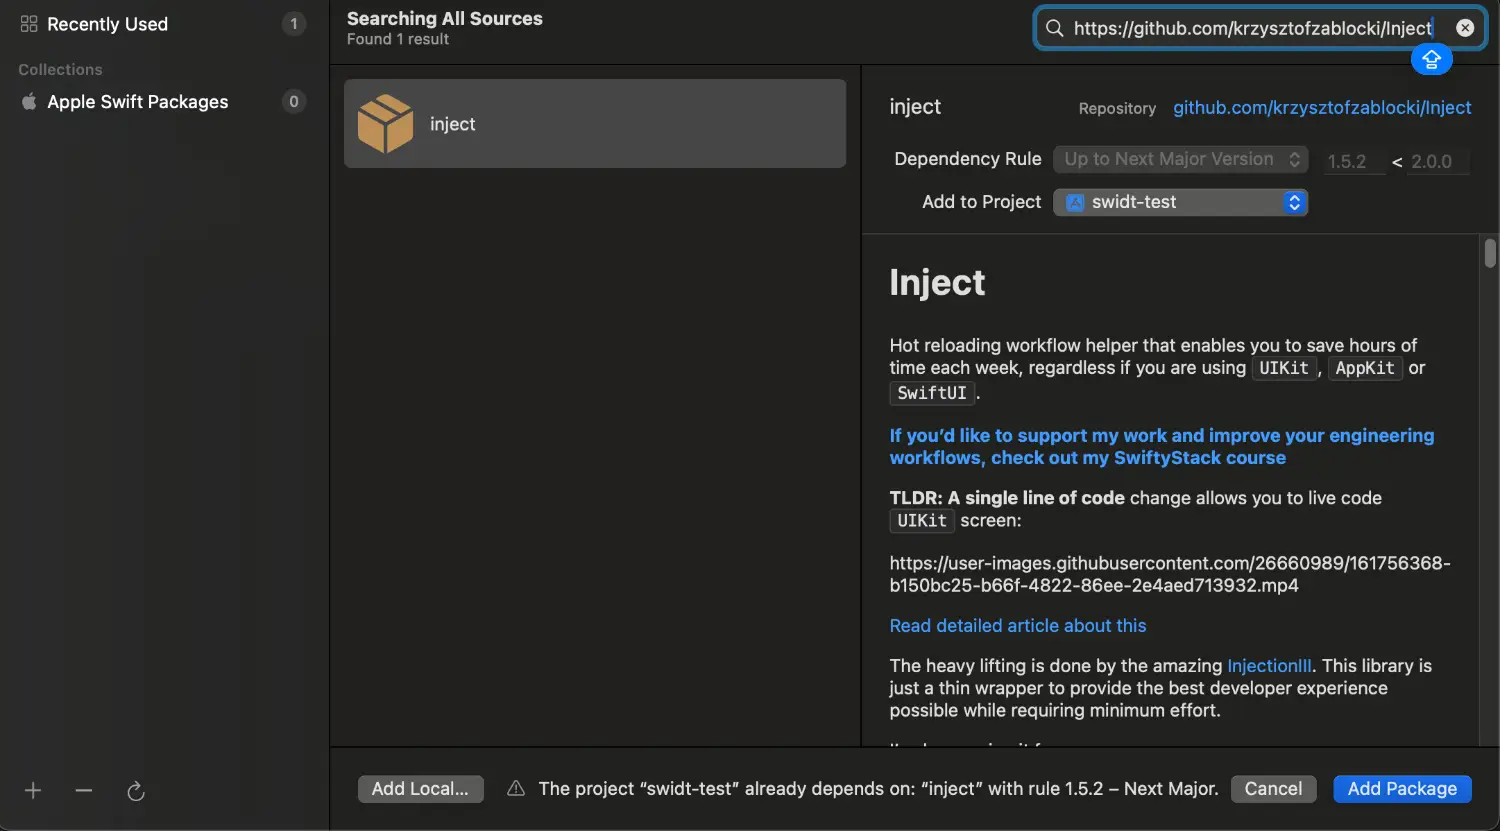
右上角輸入框輸入 https://github.com/krzysztofzablocki/Inject,將 inject 安裝起來:
injectioniii
injectioniii 是熱更新的關鍵,直接到商店安裝:連結
開啟後上方可以看到,點 Open project 打開剛建立的專案。

Cursor/Vscode 套件
打開 Cursor/Vscode 安裝 SweatPad

接著 Shift + cmd + P 輸入 SweatPad: Generate ...,這邊會生成一個 buildServer.json,等等啟動模擬器會用到。

修改專案程式碼
這邊必須在專案內新增 @ObserveInjection var inject 以及 .enableInjection()。
import SwiftUI
import Inject // 這裡

struct ContentView: View {
    // 這裡
    @ObserveInjection var inject

    var body: some View {
        VStack {
            Image(systemName: "globe")
                .imageScale(.large)
                .foregroundStyle(.tint)
            Text("Hello")
        }
        .padding()
        .enableInjection() // 這裡
    }
}

#Preview {
    ContentView()
}
啟動專案
到這邊就可以啟動專案了,點選 SweatPad 的 Build & Run(播放圖示,下圖)。

嘗試修改專案,就會在終端機看到輸出:
💉 InjectionIII connected /Users/../Developer/swidt-test/swidt-test.xcodeproj
💉 Watching files under the directory /Users/../Developer/swidt-test
💉 Compiling /Users/../Developer/swidt-test/swidt-test/ContentView.swift
💉 Loading .dylib ...
💉 Interposed 6 function references.
💉 Injected type #1 'swidt_test.ContentView'
溫馨提醒
@ObserveInjection不需要每個 View 都加,在 最上層 View 或 App struct 加一次即可,子 View 都會生效。- 如果之前專案曾經用過
InjectionIII,容易抓到舊路徑。 InjectionIII在 Xcode 16.3+ 之後不夠穩定,可考慮使用 InjectionNext 取代。